Intro
Thanks for purchasing a Keepad! This guide will help you get started using it. Before you continue, make sure you have the following:
- Dongle
- Cable (Included with dongle)
- iPad running iOS 17+
Connect the dongle
Hold the dongle so you are looking at both USB ports on the right side.
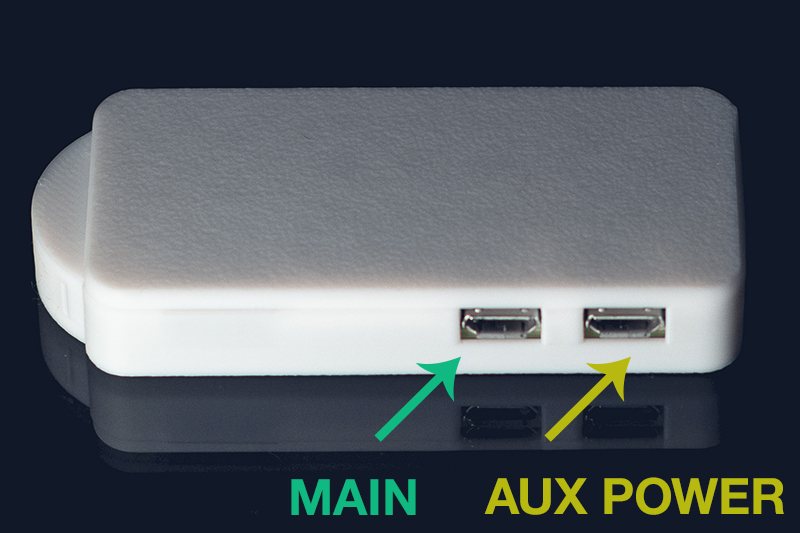
The second usb port from the right is the main one you will use to connect the dongle to your computer. In most setups this is the only one you need. The other port is used together with the main port when auxiliary power is needed. When connecting to a computer you may be need to grant permission(s) for the connection. On MacOS, you can close out of the keyboard configuration wizard that shows up.
It can take about 15 to 30 seconds for the dongle to fully power up.
Install the App
Using your iPad, open the camera and scan the QR code below to download and install the Keepad app.

If you are unable to do that, you can just search for "Keepad" on the app store and make sure you install the one with this logo

Connect the iPad to the dongle
To connect, make sure bluetooth is enabled on your iPad and your dongle is plugged in to the device you will be controlling. Open the settings view in the Keepad app and choose "Scan" from the Bluetooth section. Tap the name when you see it in the list and the app will connect. By default, the device's name will be KeepadBLE. You can change this in the app's settings once you've connected.
Using the Keepad app
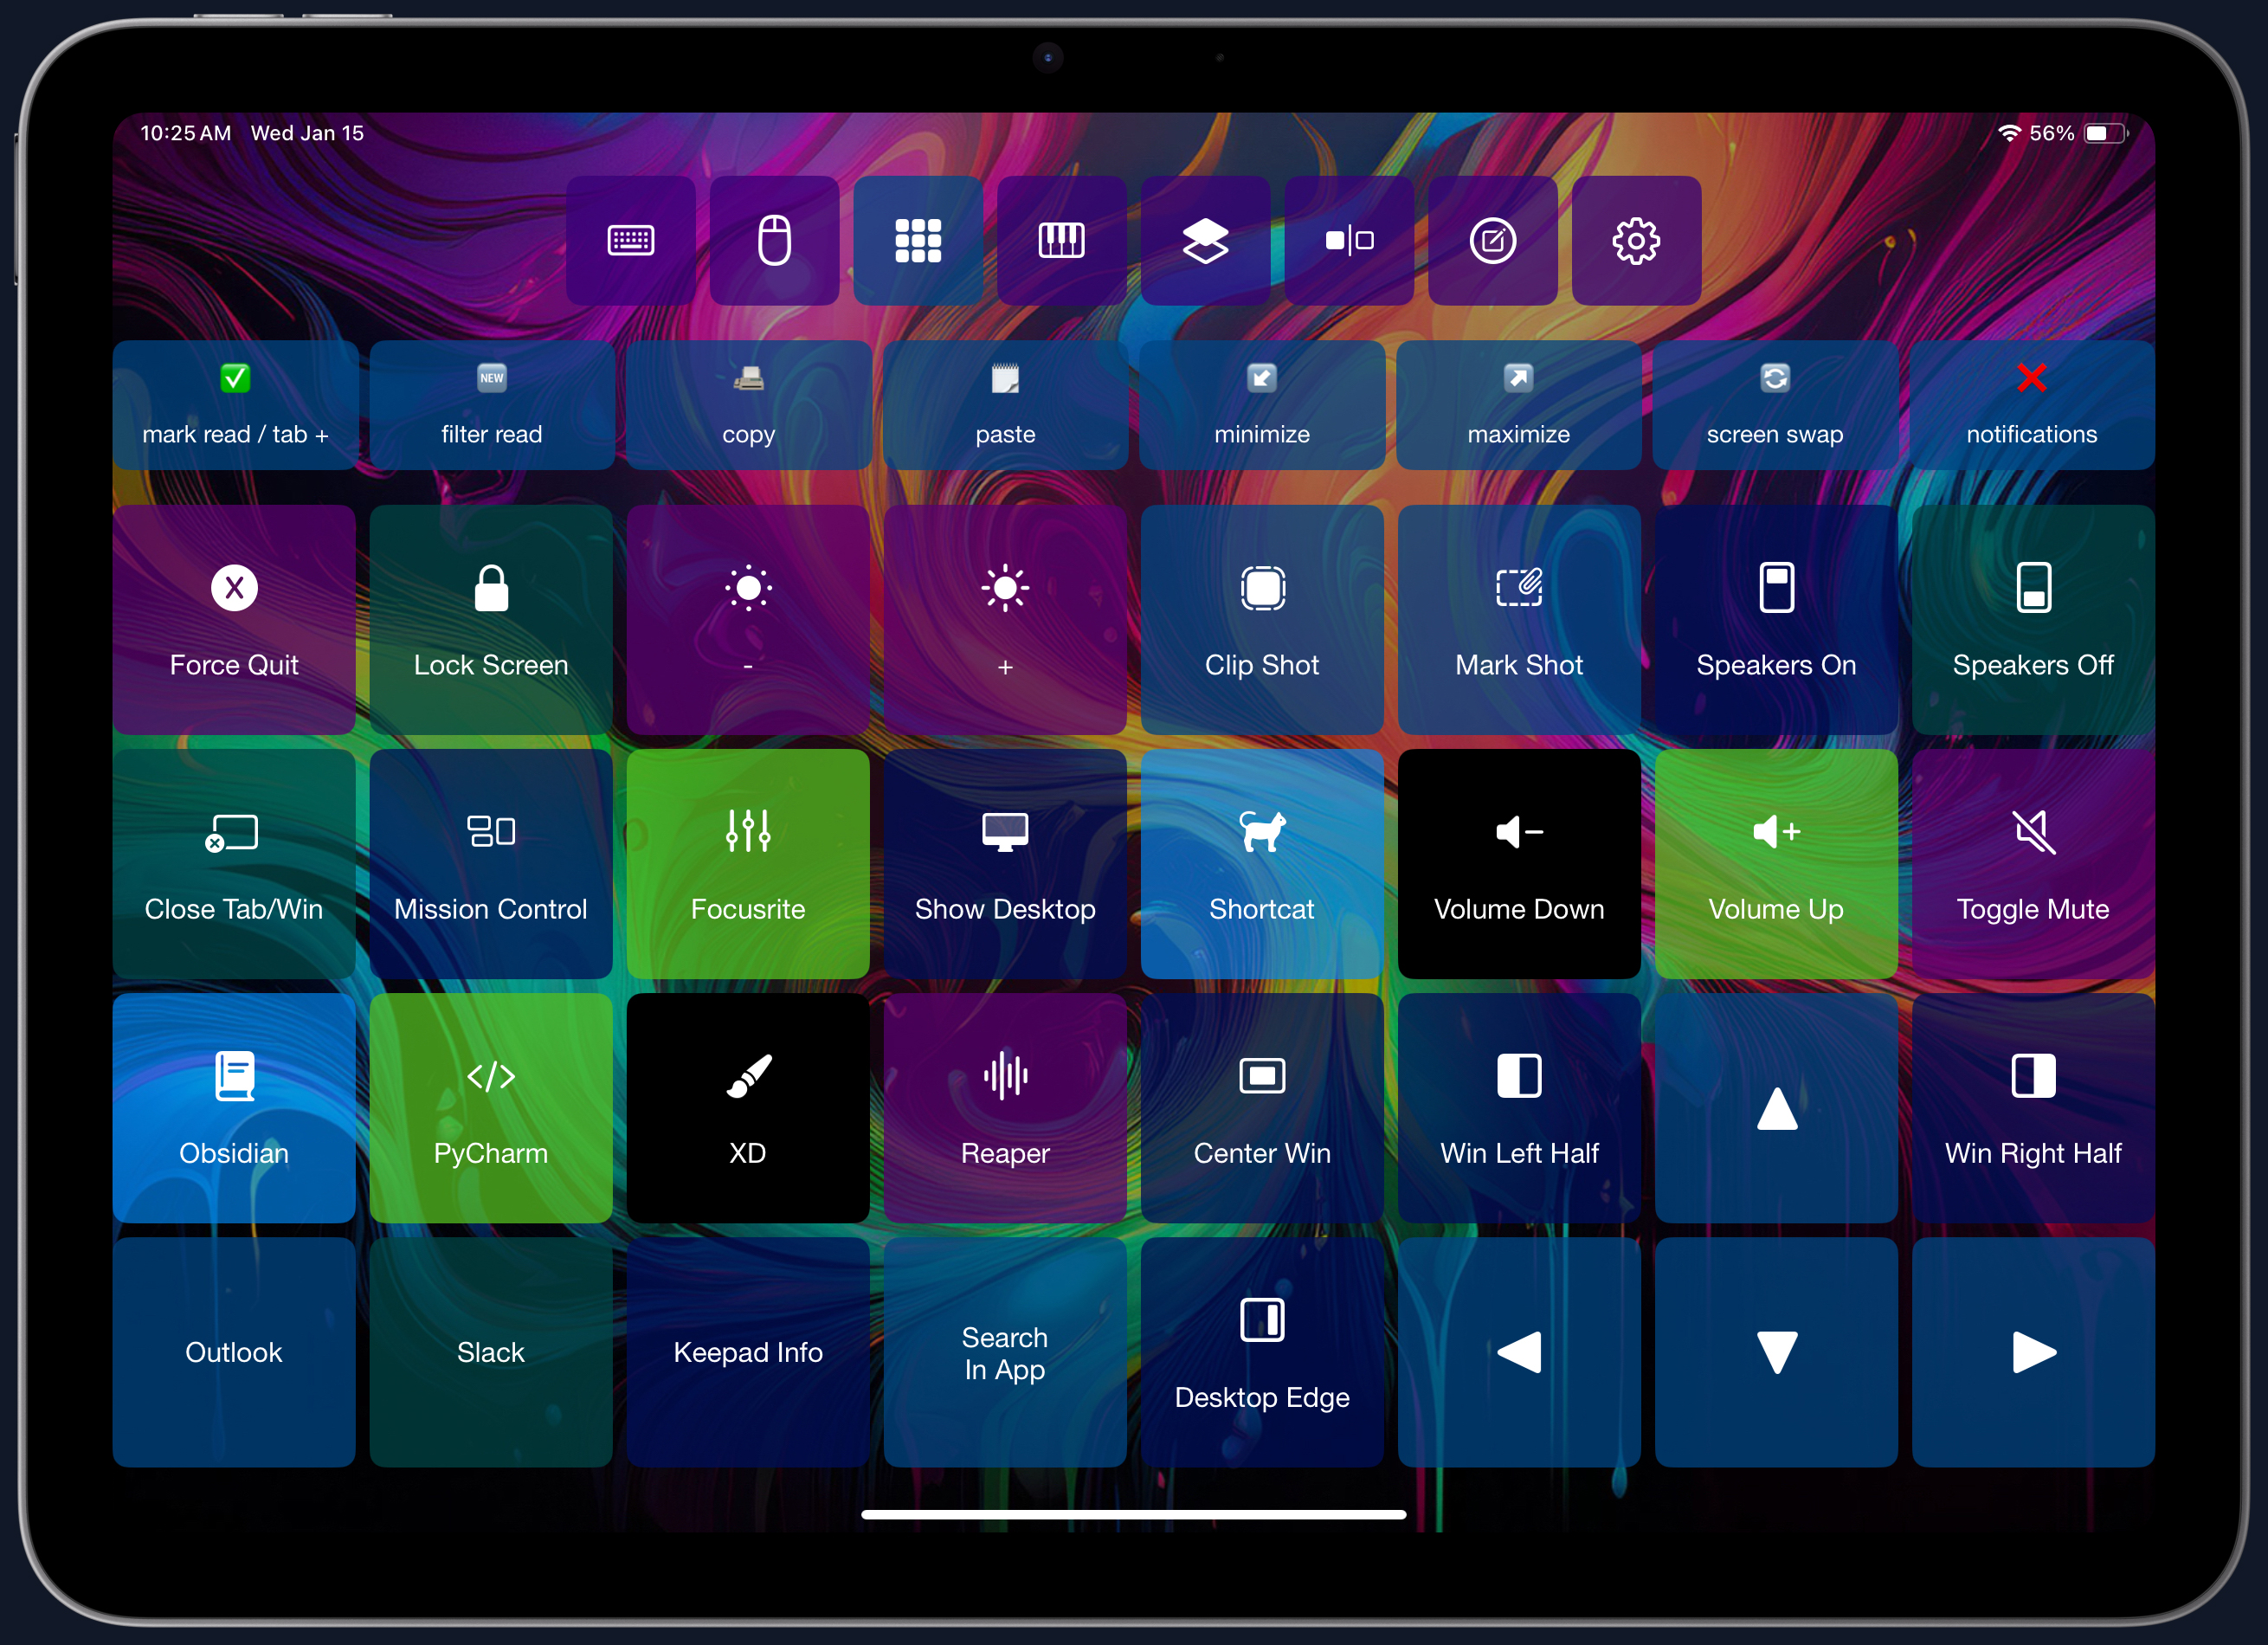
Keepad will always load and display in the landscape view. It will rotate top or bottom, but currently it doesn't support a vertical layout. The top row of icons are used for switching or toggling the various modes. They are among the few buttons that can't be customized except for the colors.
Here is a general breakdown of the modes from left to right:
- Keyboard: Switches to the keyboard.
- Touchpad: Switches to the touchpad.
- Macropad: Switches to macropad.
- MIDI: Switches to MIDI.
- Main Layer Toggle: Toggles the layers of the current mode.
- Aux Layer Toggle: Toggles the layers of the key strip (strip of buttons just below the top row of icons) or the right side of MIDI mode for more buttons and 4 sliders.
- Edit Toggle: Toggles edit mode. When this is on, pressing a button will open it's editor.
- Settings: Display's the main settings for the app
Icons
When editing buttons, the very first option is for adding icons (sf symbols). The SF Symbols are Apple's baked in icons. You can learn more about them here:
https://developer.apple.com/sf-symbols/There's also this app you can use to look them up on the iPad:
https://apps.apple.com/us/app/sf-symbols-reference/id1491161336Hyper
In the list of commands you can choose, there is one titled "hyper." This key will press all of the right-handed modifier keys (Right shift, Right ctrl, Right option/alt, Right command/meta). It is often used in place of a caps-lock key, to give you an extra modifier key for shortcuts.
Recommended Apps:
The following apps are recommended for unlocking the true power of shortcuts and to leverage as many buttons on your Keepad as possible:
MacOS
Windows
Browser: Chrome / Edge